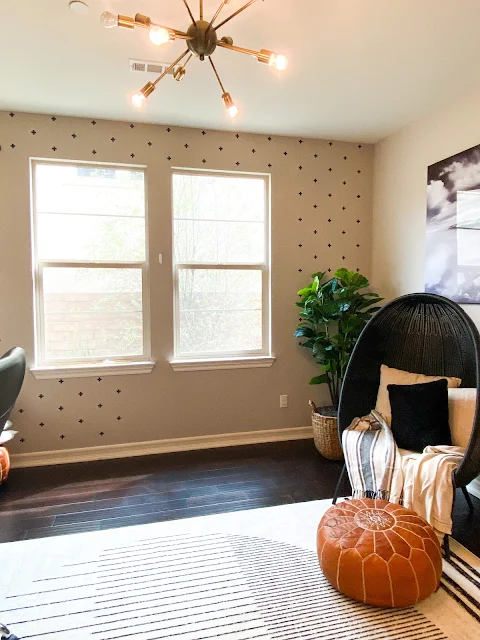
A few years back I added vinyl decals all over an accent wall in an already-decorated room.
Everyone asked me then how I did it and I've been saving this trick ever since.
When I recently moved the couch to sell it and replace it with different furniture to convert this room into Bob's home office, I realized I never added the decals on the wall that had been previously covered by couch and curtains.
This gave me the opportunity to use this trick again...so this time I'm going to share how I lined up the vinyl decals without wasting a bunch of vinyl and without measuring!
Fortunately I still had the cut file of the original crosses so I just cut a bunch more on black Oracal 631 which is perfect for painted indoor walls. The vinyl sticks, but it's removable without peeling off the paint.
The cutting is the easy part - getting individual vinyl decals on an accent wall isn't quite so easy...unless you have a piece of printer paper. That's right I didn't measure at all when applying the decals - nor did I use transfer tape. I simply picked the vinyl decals up and placed them on the wall by hand.
To know where to place them I used a piece of 8.5" x 11" printer paper held landscape against the wall. I placed a vinyl decal at each corner. Then I moved the paper and repeated. Then I marked the exact center of the paper (you can fold it in quarters), placed the center on one of the crosses, and put another decal on each corner.
This was such a fast way to do the entire wall the first time..and even faster when I had to fill in the blank area of the wall.
Get Silhouette School lessons delivered to your email inbox! Select Once Daily or Weekly.


.png)


This is awesome. Thanks for the tutorial. Love, love it!
ReplyDeleteCan you do this on a textured wall or only flat? Wondering if the vinyl will hold?
ReplyDeleteawesome great tip
ReplyDeleteLove the tip. Will make thins so much easier in the future.
ReplyDelete