As if glittered tumblers couldn't get any more stunning...today I'm sharing how to make an Ombre Glitter Tumbler!
This post will focus mainly on how to apply multiple glitter colors to a tumbler, so if you’re new to epoxy tumblers...make a u turn right now and start with this full start to finish tutorial on how to make epoxy tumblers.
To make an ombre glitter tumbler, you’ll need at least two different colors of paint and glitter for this ombre technique, but you can use as many colors as you want. For these rainbow ombre tumbler, we used six different paint and glitter colors.
To make an ombre glitter tumbler, you’ll need at least two different colors of paint and glitter for this ombre technique, but you can use as many colors as you want. For these rainbow ombre tumbler, we used six different paint and glitter colors.
Try to get the glitter and paint colors to somewhat match, but they don't have to match perfectly.
How to Pre-Paint a Glitter Ombre Tumbler
Start with painting your tumbler, and spray paint would definitely be the fastest way to do this; but, for a multi-color tumbler you'd need multiple colors of spray paint and perhaps some super awesome spray paint skills to get the colors exactly where you want. (And if that's you, then go for it!)But, an easier and cheaper alternative is to first spray paint your stainless steel tumbler white, then use inexpensive acrylic paint to add color.
The trick to applying acrylic paint with a paintbrush is to not let it get too thick. Apply thin coats of paint around the tumbler,
feathering the edges of one color into another - but it doesn't have to be perfect. In fact, the “quick and dirty" painting method is to apply and blend the paint with your finger – it works, just make sure the paint isn't too thick!
Let the paint dry and reapply for a deeper color. It’s actually not necessary to get 100% solid paint coverage since you will be adding glitter over the top anyway. And don’t worry if the blending between colors isn’t perfect – the glitter will take care of that.
How to Glitter a Multi Color Tumbler
Next, set up your workspace for the glittering process with some parchment or butcher paper (for easy clean up), a small stack of copy paper to work on, and several empty plastic cups within reach
To apply glitter to the tumbler, spray an adhesive like
Loctite General Performance Lightweight bonding spray adhesive over the dry
paint. Then, hold the tumbler over the copy paper and gently tap one color of glitter onto its similar color on the tumbler.
Work your way around the tumbler by rotating it until you have covered the first color. Just let the excess glitter fall onto the copy paper below.
Work your way around the tumbler by rotating it until you have covered the first color. Just let the excess glitter fall onto the copy paper below.
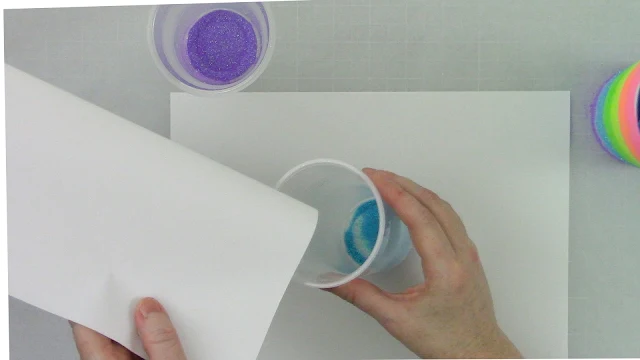
Then, carefully set the tumbler off to the side, pick up the paper, gently bend it in half, and pour
the excess glitter into a plastic cup. Try to tap off as much glitter into the
cup as possible so the paper is fairly clean. Place the cup off to the side and the paper back down onto your
workspace. (If you really can't get the paper fairly clean, just use a new sheet.)
Next, grab the next color of glitter and gently tap it onto its similar paint color on the tumbler. Try not to get this color into the previous color. Don’t worry about blending the two colors together right now. Just focus on getting good glitter coverage. If there is a hard line between the glitter colors that’s okay for right now.
Apply this color of glitter like before and let the excess fall onto the clean piece of copy below.
Then, pour the excess glitter into a separate cup. By pouring the excess glitter colors into their own cups, you aren't contaminating them and can reuse them later.
Repeat this same process with each color until the entire painted area of the tumbler is covered with glitter. You can respray the adhesive and apply another layer of each
color of glitter to get more solid coverage. Again, don't worry too much about blending the colors together just yet - just cover the tumbler with glitter until you're happy with the coverage.
How to Blend Glitter for an Ombre Glitter Tumbler
The next step is to start blending the colors together to get that ombre effect.Grab a clean cup, take your first glitter color (red in this case) and sprinkle a little into it. Then, take the next glitter color (orange) that sits adjacent to it on the tumbler and sprinkle a little of that color into the same cup.
Swirl the cup to mix the glitters together which creates a new glitter color blend. (I put the first set of glitter colors on this copy paper to take a picture, but then poured it into a cup.)
Do this for every adjacent glitter color. For a 6-color rainbow tumbler, you'll end up with 5 glitter mixtures. This project ended up using 11 plastic cups in all - which seems like a lot, but you can rinse them out and reuse them for other projects.
And you don't need to mix all of each glitter color together. Reserve some of the uncontaminated single color to reuse on this project if you need it or pour it back into its original container.
Before you add the mixed glitter colors, spray the tumbler with adhesive so the glitter has something to stick to.
Take your first glitter mixture and gently sprinkle it along the line where the two colors that comprise it meet. What you want is to soften this line between these two colors with this new "transitional" color mixture to try to get a seamless blend from one color into the next.
Take your first glitter mixture and gently sprinkle it along the line where the two colors that comprise it meet. What you want is to soften this line between these two colors with this new "transitional" color mixture to try to get a seamless blend from one color into the next.
Pour the excess glitter mixture that falls onto the copy paper back into its cup and repeat this process between each set of colors. You can respray
the adhesive and repeat this process of adding the glitter mixtures to each transition area to soften and blend away any hard color lines until you're happy with how it looks.
To seal the glitter, spray the tumbler with clear
polyurethane like Krylon Clear Polyurethane. This helps set the glitter in place so that it
stays put when you apply the epoxy over it.
How to Epoxy a Glitter Tumbler
While the epoxy is curing, open Silhouette Studio and import
the design you want to use for the vinyl decal on your tumbler.
The hilarious design used for these tumblers comes from the
May SVG and Font Bundle over at SoFontsy. This month’s expertly curated bundle
includes a selection of 113 popular and trendy SVGs and 11 fonts bundled together for an impressive
savings - 94% off! But it’s only available in May 2020 so you wanna
get it before it’s gone!
To create this design, we added a 0.050-inch offset around the "Running" part of the design (right-click to ungroup the design and then select only the “Running” group to add the offset. The offset and the words "Mouth" and "Cardio" were cut in black vinyl, while the rest was cut in white vinyl and layered on top.
For perfect vinyl layering, add
registration marks to the top of the design in Silhouette Studio. Here’s a great post that explains exactly how to layer vinyl.
Cut and weed your vinyl. We used black and white Oracal 651 and Oracal Transfer Tape. When layering vinyl, start with
the top layer, apply transfer tape so you can transfer this layer onto the next layer by lining up the registration marks.
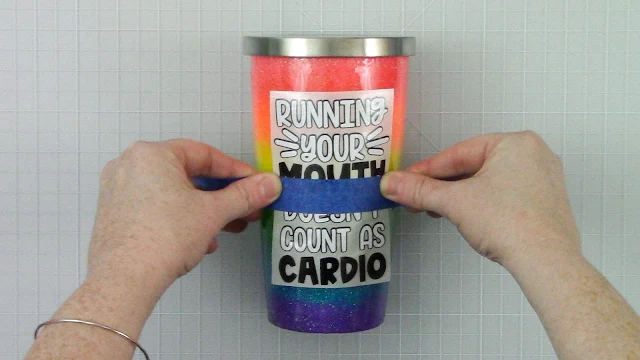
After the epoxy has cured, apply the vinyl decal onto your tumbler (the hinge method works great!). Then, apply another layer of epoxy to seal everything in!
And there you go! A multi-color, multi-glitter tumbler
masterpiece that is sure the impress! And this design is just one of 113 SVGs and 11 fonts in the SoFontsy May SVG and Font Bundle. Check it out!

Note: This post may contain affiliate links. By clicking on them and purchasing products through my links, I receive a small commission. That's what helps fund Silhouette School so I can keep buying new Silhouette-related products to show you how to get the most out of your machine!

Note: This post may contain affiliate links. By clicking on them and purchasing products through my links, I receive a small commission. That's what helps fund Silhouette School so I can keep buying new Silhouette-related products to show you how to get the most out of your machine!
Get Silhouette School lessons delivered to your email inbox! Select Once Daily or Weekly.


.png)


Love it!! Which brand of paint/colors did you use? As well as the colors of glitter? They matched perfectly
ReplyDelete