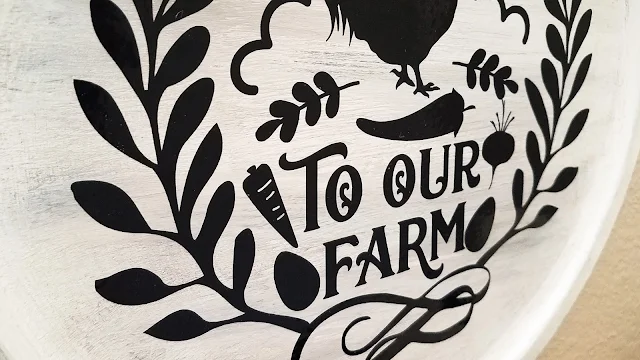
These farmhouse style signs made with Dollar Store pizza pans are really popular right now. You can spray paint them and add vinyl for a clean crisp look.
Getting that more rustic farmhouse look requires painting by hand. Painting this way gives the pan some
texture to mimic the look of real, distressed farmhouse wood
You'll want to use gray and white chalk paint, a foam brush, and stencil brush for paint application.
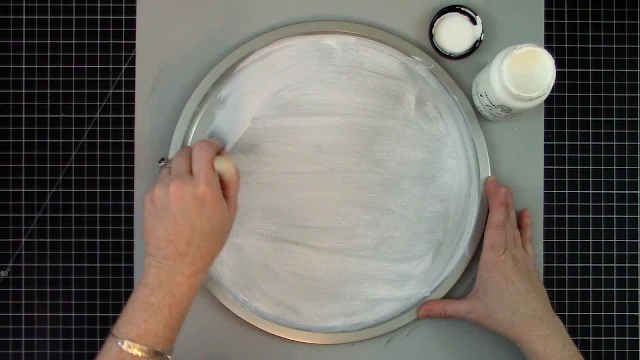
First, start by painting the pan white. You’ll need to build up the paint layers to achieve good coverage. Apply a thin coat of paint, let it dry, then apply another layer.
You really don’t need to get a 100% solid white coat of paint. If some of the gray/silver of the pan shows through, that’s fine because it helps add to the distressed look we’re going for.
You really don’t need to get a 100% solid white coat of paint. If some of the gray/silver of the pan shows through, that’s fine because it helps add to the distressed look we’re going for.
Next, use a stencil brush, a VERY light hand, and the
tiniest amount of gray chalk paint to swipe random horizontal lines over the
dry white paint. It can be easy to overthink this part, but don’t – just work
quickly to get a more random, natural pattern to it.
Immediately after applying the gray paint, use a towel or rag to rub over them to soften them up a bit.
Immediately after applying the gray paint, use a towel or rag to rub over them to soften them up a bit.
Keep repeating this process with the gray paint until you are happy with how it looks.
Now if you add too much gray paint, that’s totally okay because you can go back in with the white paint and stencil brush. You don’t even need to clean your brush because the mixture of gray and white paint helps add more color dimension to the sign.
Now if you add too much gray paint, that’s totally okay because you can go back in with the white paint and stencil brush. You don’t even need to clean your brush because the mixture of gray and white paint helps add more color dimension to the sign.
Now, set the pan aside to let the paint dry completely, and then cut out your vinyl
design. There are lots of rustic designs in the Giant Farmhouse Bundle.
Cut and weed your vinyl and apply it to the pan using the hinge method. This way you will get the vinyl straight and centered in the circular pan (on your first time!).
To apply using the hinge method, after applying transfer tape over your vinyl, keep the vinyl backing on and center the design on your pan. Lay a strip of low tack tape (like blue painter's tape) right down the middle and secure to the pan.
Peel back one half of the transfer tape (with the vinyl attached to it) off the vinyl backing.
Then, take scissors and cut away that half of the vinyl backing and remove it. Then, lay back down the transfer tape so you can burnish the vinyl directly onto the pan.

Then, repeat these same steps on the other half. Peel back the transfer tape, remove the vinyl backing, and burnish the vinyl directly onto the pan.
And make sure to burnish the vinyl really well! Then, remove the transfer tape.
Now, if you’d like to add a bow to your sign but have “bow-commitment-phobia” – the fear of a permanent bow application on your sign - here's how you can temporarily adhere one. This then allows you to switch it out for different seasons or if you change your home décor.
Now, if you’d like to add a bow to your sign but have “bow-commitment-phobia” – the fear of a permanent bow application on your sign - here's how you can temporarily adhere one. This then allows you to switch it out for different seasons or if you change your home décor.
Take your bow and loop some wire (like floral wire) through the middle, being careful to keep the wire as hidden as possible from the front.
Then, using either a binder clip or tape, secure the wire to the
back of the pan so that the bow sits on the front top edge of the pan. Of course, if
you did want to attach a bow permanently, you could always do so with a glue
gun.
And because this sign is so lightweight, a couple 3M command strips on the back is a great way to hang up your sign!
And because this sign is so lightweight, a couple 3M command strips on the back is a great way to hang up your sign!
And there you have it! 2 signs, 1 Giant Farmhouse Bundle, two
different styles.

Oh the possibilities! This bundle is now 89% off at So Fontsy and only available for a limited time!
These two signs were both created using designs from the Giant Farmhouse Bundle from So Fontsy, yet each has a slightly different style to it. It just depends on how you paint it. And with 156 SVGs and 1 alphabet set to choose from in this bundle, you can also achieve your desired sign style for a one-of-a-kind home decor piece.
Note: This post may contain affiliate links. By clicking on them and purchasing products through my links, I receive a small commission. That's what helps fund Silhouette School so I can keep buying new Silhouette-related products to show you how to get the most out of your machine!
Get Silhouette School lessons delivered to your email inbox! Select Once Daily or Weekly.


.png)


No comments
Thanks for leaving a comment! We get several hundred comments a day. While we appreciate every single one of them it's nearly impossible to respond back to all of them, all the time. So... if you could help me by treating these comments like a forum where readers help readers.
In addition, don't forget to look for specific answers by using the Search Box on the blog. If you're still not having any luck, feel free to email me with your question.