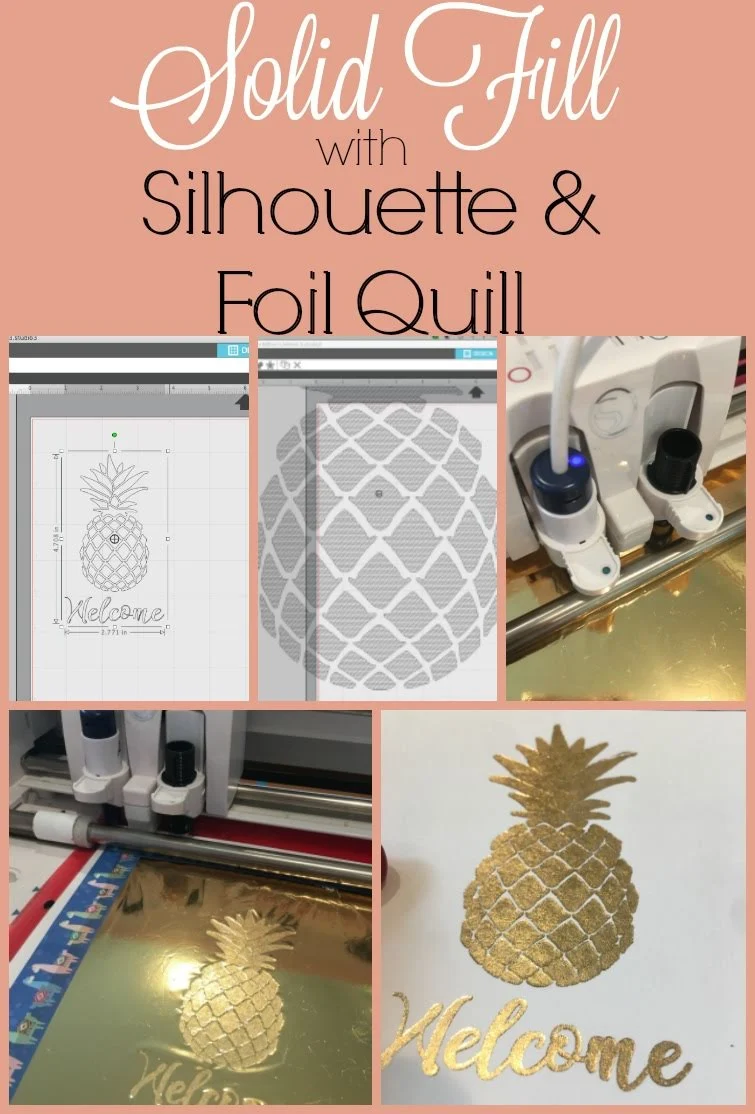
Because the Foil Quill works the same way as a Silhouette blade or sketch pen it will only leave a foil outline. However, using the sketch fill options in Silhouette Studio, you can create a solid foil fill with the Foil Quill.
To have the sketch options in Silhouette Studio you will need Silhouette Studio Designer Edition. This is a one time paid upgrade...but it unlocks a lot of extra tools and features.
The process to create a solid foil fill with Foil Quill and Silhouette will work on both designs and text. For this Silhouette project and tutorial, we'll use it on this pineapple design which is part of the So Fontsy March Bundle.
If you foiled the design like this - you would get a foil outline, just as you see here with the cut lines. In order to fill the design with foil you need to tell the software and the machine to do that by adding A LOT of internal lines.
Start by opening the design in Silhouette Studio. Size the design to slightly larger than what you want the final size to be.
Select the design you want to fill with foil and open the Sketch tool on the right sidebar.
With the text selected, click "Plain" in the Edge Sketch area and "Grill" in the Fill Effects area.
This should put a bunch of lines through your text design.
Now open up the Advanced Sketch tools by clicking the second tab in the Sketch Panel. Again click "Plain" as the Edge Effect.
In the Fill Type area pull the Spacing and Angle lever bars all the way to the left. The sketch lines are most likely not close enough yet to produce a solid fill.
Open the Transform panel and click the Scale tool. With the design still selected, manually type in 500%.
This will increase the scale of the text or design by 500%.
In the Sketch panel that you still have open, go back to the basic Sketch tool and click "Release Sketch." It won't look like anything happened, but don't worry - it did!
Still keeping the design selected, once more go back to the Scale tool. This time type in "10%"
Your design will now have more lines across it so when you foil with the Foil Quill in your Silhouette CAMEO or Portrait the text will get a solid foil fill.
If you need to re-size your design slightly after all that scaling you can do so now.
Now in the Send panel you want to change the settings to the best Silhouette cut settings for Foil Quill on paper.
When filling with foil, I found the best results with the broad Foil Quill tip and an even slower speed of 2.
Follow the steps in the Foil Quill and Silhouette Beginner tutorial to set up the Foil Quill and material on the cutting mat.
Load the mat into the Silhouette machine and from the Send panel click "Cut" to begin the foiling.
Depending on the size of the design it will take awhile to complete the filled design.
When the foiling is complete you can unload the mat and material from the machine and remove the tape and foil to reveal your filled foil design!
Note: This post may contain affiliate links. By clicking on them and purchasing products through my links, I receive a small commission. That's what helps fund Silhouette School so I can keep buying new Silhouette-related products to show you how to get the most out of your machine!
Get Silhouette School lessons delivered to your email inbox! Select Once Daily or Weekly.


.png)


Thanks for the tutorial. I bought the Designer + and have found that I do not have the option of changing spacing under sketch, only in advanced sketch and following all other instructions I still cannot get such a tight fill. Any advice?
ReplyDeleteThanks,
Perplexed in GA
Hey there! This could be due to having an older version of Silhouette Studio.
Delete