If you have Silhouette Studio Designer Edition (or higher) you can bring the SVG file into Silhouette Studio by dragging and dropping into a library folder and just turn the cut lines on - no tracing required.
If you don't have Designer Edition, I suggest you use the DXF version - again to avoid tracing.
Turning Cut Files into Stencils in Silhouette Studio
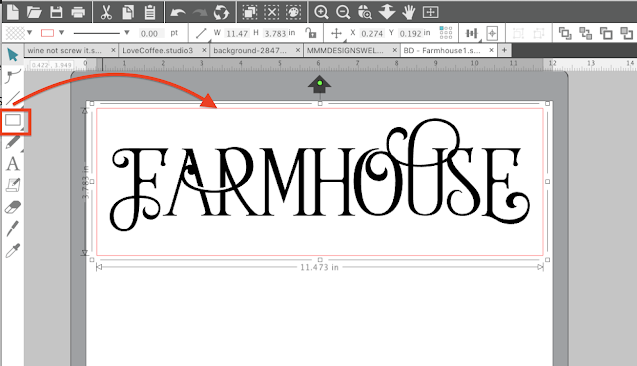
The Farmhouse and Home designs I'm using - like most on So Fontsy - are cut-ready so no modifications except for sizing are needed once it's in Silhouette Studio. Just measure your piece of wood and then size the design accordingly by selecting it and pulling the corner node in or out.Since I'm going to use this design as a stencil I used the Draw a Box tool to draw out a box around the design. This allows you to cut it on vinyl and then weed away the actual design exposing the stencil area for paint.

TIP: If you won't be wasting to much stencil material or vinyl, make the box the same size as your piece of wood. This will not only cover the exposed area where you don't want paint to go, but it will also help you to align the stencil to the center since the stencil is the exact size as the surface.
Then fill the design with a solid color (match it to your vinyl if that makes it easier for you to visualize).
Cutting Oramask 813 Stencil Film
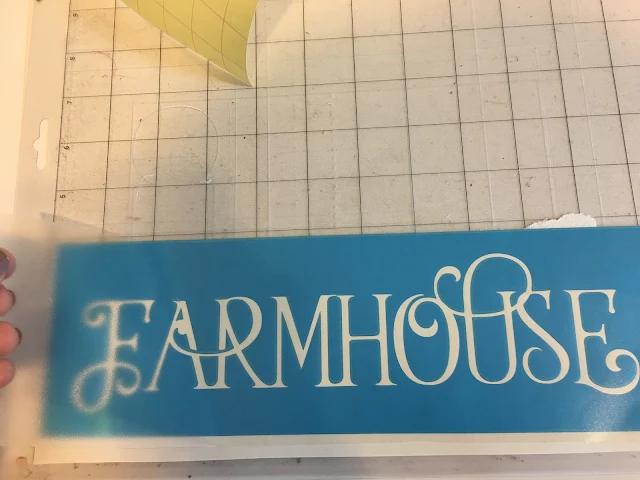
Okay now you're ready to cut your stencil so move into the Send panel. Depending on what type of material you're going to use to cut your stencil on, select it from the Material menu. I would suggest you use Oracal's Oramask 813 stencil film. The recommended Silhouette CAMEO cut settings for Stencil Material can be used to cut the Oracal stencil material.After the design has cut, weed out the letters, leaving the base of the stencil.
Preparing Wood for Paint Stencils
Place the stencil to the side for a few minutes while you prepare the wood. Sand the piece of wood down keeping in mind that any channels or un-smooth areas in the wood can lead to paint bleeds as the paint can seep under the stencil in these areas.If you're working on rustic farmhouse-style wood signs like me, maybe you don't mind a little paint bleed since it can add to the character and style of the sign.
Paint or stain the base coat if you'd like or need to and let it dry completely.
Applying a Stencil to Wood
Cut a piece of high tack transfer tape slightly larger than the size of the stencil and place it over top.METHOD 1: If the stencil is the same size (or the exact length or width) as the piece of wood you can peel up the transfer tape lifting the stencil off the backing. Line up one corner or edge and then place the stencil down onto the wood piece.
METHOD 2: If your stencil is not the same size as the piece of wood, after you place the transfer tape over the cut stencil material, don't remove the backing. Instead, keep the backing on the Oramask 813 while you use the hinge method to correctly place the stencil evenly on the wood.
Use a scraper to burnish the stencil through the transfer tape then carefully peel the transfer tape up leaving the stencil on the wood.
Make sure all edges of the Oramask 813 stencil are firmly pressed down - especially any small areas.
Painting Wood Signs with Stencils
The right paint, applicator, and application method can make all the difference when it comes to painting a stencil.I would recommend using a makeup sponge to apply chalk-paint in a dabbing up/down motion. You don't want to brush on that paint as that's another opportunity for paint to get under the stencil and create bleeding. It's better to put on a second coat of paint than having too much paint on the first coat.
If you need to apply a second coat of paint do so and then wait just a few minutes before pulling off the stencil. You don't want the paint to the fully dry or it could pull up when you remove the stencil.
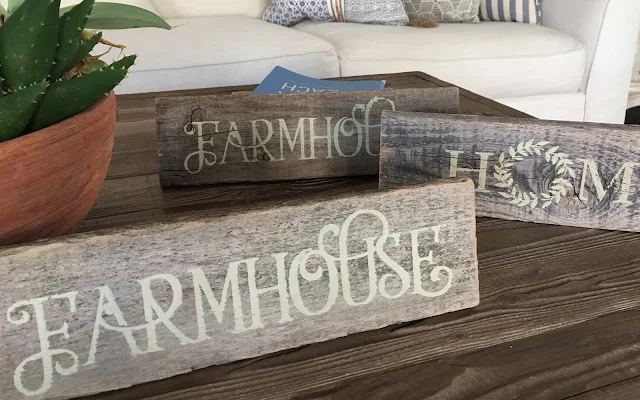
This method results in crisp paint lines even on weathered wood like this barn wood.
For a more rustic and weathered look you may want to sand down your sign again. This also helps even out the paint and hide any little mistake areas. And that's it!
Note: This post may contain affiliate links. By clicking on them and purchasing products through my links, I receive a small commission. That's what helps fund Silhouette School so I can keep buying new Silhouette-related products to show you how to get the most out of your machine!
Get Silhouette School lessons delivered to your email inbox! Select Once Daily or Weekly.


.png)


These turned out beautifully. I especially like the color of the wood you used. Is it natural or did you use stain? If so, what color did you use to stain it?
ReplyDelete