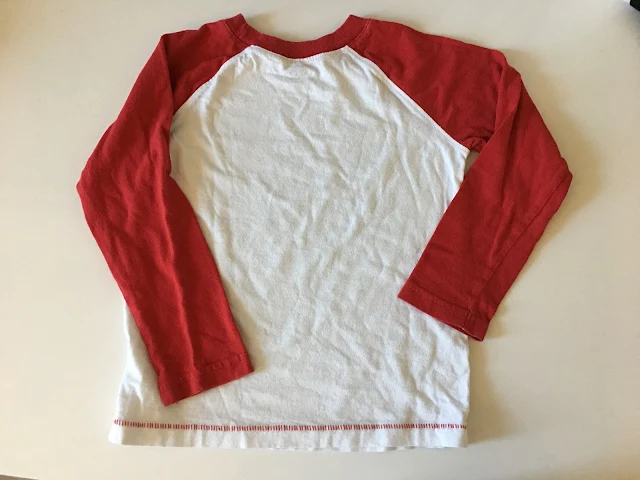
You can purchase stock mockup photos or you can create your own - which is what I do.
Before we talk about how to photograph your own mock up photos...I need to point out the number one rule of mock ups and it's not about the mock up at all: make sure you can make the actual item. A mock up comes in handy when you are doing variations of the items such as the same design on two or three different color shirts.
Step 1: Find Blanks to Photograph
Find blanks that you want to photograph to use in your mock ups. These can be blank shirts (the front has something on it...flip it over and use the back), blank towels, bags, wood signs, empty picture frames.Step 2: Prep Your Blanks
That means iron out the wrinkles, wipe off the smudges, remove any stains...Step 3: Find Your Background
This can be a white wall or table top in your house, poster board or foam board, a wood floor, or a wood table. If the items are small enough you can use 12x12 wood grain scrapbook paper as your background or purchase rolls of wood grain backgrounds.Place your item on the background and position it so the surface area where the design would go is front and center. Make sure you don't have any wrinkles...or shadows. Which leads to...
Step 4: You Need Good Lighting
Good natural lighting is key! If possible, try to avoid shadows and glares. If you don't have a spot in your house that gets good natural light, invest in some studio lights. You can lighten and enhance photos, but you want to keep editing to a minimum if you can.Step 5: Grab Some Props
If you're creating mock ups for a specific holiday or season add some props such as pumpkins in the fall or evergreen sprigs, ornaments or berries in the winter. It's always a good idea to take two versions of these mock up photos - one with and one without the props - so you can use them all year round.Step 6: Snap Your Photos
You don't need a fancy camera to take good quality mock up photos. Phone cameras have become so advanced that they'll give you great photos! If you don't have a steady hand, mount your phone on a tripod. (I use this Manfro tripod.)Step 7: Run Your Photos Through a Filter
I love the Camera+ app for quickly editing photos. Usually the Flash filter is enough to give me bright, crisp photos. But test out a few filters to see how your photos look best, then re-save them to your camera roll or share to your computer directly from Camera+ app.Step 8: Import to Silhouette Studio
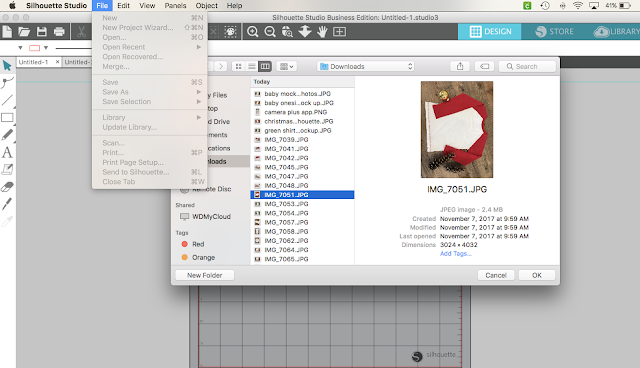
Airdrop or email the photos to yourself and import them into Silhouette Studio with a quick File > Open.When adding designs to your mock up photos, drop the transparency of the solid fill and line color to between 10 and 12%. (Make sure your line color is the same as the fill color.)
Step 9: Export Your Mockup Photo
If you have Silhouette Studio Business Edition, you can easily save the mock up photos as a JPEG from Silhouette Studio. Select both the photo and the design on top of it and click File > Save Selection > change the file type to JPEG.If you don't have Business Edition, you can use the snipping tool (PC) or the grab tool (MAC) to save the mock up photo to your computer.
Note: This post may contain affiliate links. By clicking on them and purchasing products through my links, I receive a small commission. That's what helps fund Silhouette School so I can keep buying new Silhouette-related products to show you how to get the most out of your machine!
Get Silhouette School lessons delivered to your email inbox! Select Once Daily or Weekly.


.png)


No comments
Thanks for leaving a comment! We get several hundred comments a day. While we appreciate every single one of them it's nearly impossible to respond back to all of them, all the time. So... if you could help me by treating these comments like a forum where readers help readers.
In addition, don't forget to look for specific answers by using the Search Box on the blog. If you're still not having any luck, feel free to email me with your question.