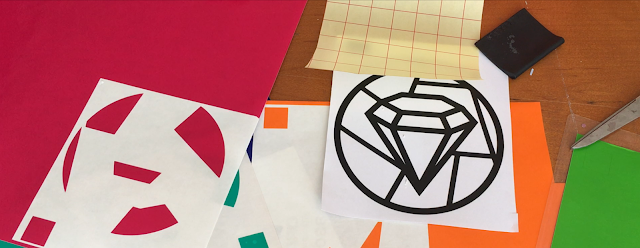
Despite the transparent vinyl which gave me all the heart eyes, many people seemed to see past the stained glass vinyl decal design and focus on the amount of wasted vinyl. I have to admit - you're not wrong (although did you see that transparent vinyl - OH EM GEE!!).
The problem is there's really no way around wasting some vinyl, if you want to create multi color vinyl decals with Silhouette without gaps. But there are ways to reduce the amount of waste.
What you didn't see in this vinyl layering video is how I actually limited the amount of wasted vinyl as much as possible by making slightly adjustments to each layer in Silhouette Studio before I cut that gorgeous transparent vinyl. (By the way the best Silhouette cut settings for the Oracal Transparent Vinyl are: Material Type: Vinyl, Glossy; Blade 2; Speed 5, Force (aka Thickness) 12.)
How to Layer Vinyl with Silhouette Studio
If you need a step by step tutorial on how to layer vinyl designs with Silhouette, check out this tutorial. (Layering heat transfer vinyl with Silhouette is a different technique, so check out this tutorial if you're layering HTV.) To quickly recap how to layer adhesive vinyl with registration marks and Silhouette...- Create the design in Silhouette Studio
- Use the Draw a Rectangle Tool in Silhouette Studio to create two registration marks above the design
- Cut each color section separately including the registration marks with each layer using the Cut By Color advanced settings
- Use a piece of clear transfer tape to pick the top most layer (and registration marks) first
- Release the vinyl from the backing
- Use the same piece of transfer tape, now with first layer of vinyl on it, to pick up the subsequent layers one by one using the registration marks for placement
That being said, I can assure you if you try to layer vinyl without registration marks and instead by "eyeballing" it and placing by hand, you'll almost always end up with gaps in your vinyl decal and again you're back to wasted vinyl.
How to Use Less Vinyl when Cutting Multi-Colored Vinyl Decals
So...to help limit the waste when layering 2 color vinyl decals (or more), you want to add a step in Silhouette Studio between Step #2 and #3 above.In this step you want to use the Draw a Rectangle to draw out a weeding box around your design and registration marks in Silhouette Studio. A weeding box helps you remove the least amount of excess vinyl from around your design.
This is how it looks when you cut it. You can see here how tight the vinyl was weeded around the edge of the design.
The size of the weeding box will be adjusted depending on the layer you are cutting with your Silhouette cutting machine. For example, when I cut the black layer of this vinyl decal on the black Oracal 651, I needed the full size weeding box since the black layer is the largest layer.
That results in this black layer which is the largest piece of the stained glass vinyl decal...

As I move through the Cut By Fill color options in Silhouette Studio's advanced Send panel, and go to cut each of the other layers, I can change the size of the weeding box based on the position of the pieces in that layer.
I have shaded the weeding box for each layer to help you can see how I reduced the size of the box for each of the layers - cutting the smallest piece of vinyl possible for the given layer. For this 6 layered vinyl design, I was able to reduce the weeding box by a full 2" in length on some of the layers.
Is there still some waste when making layered vinyl designs - yes....but this weeding box method will help you limit the waste while also allowing you to still use those trusty vinyl layering registration marks which guarantee your vinyl - stained glass transparent vinyl or otherwise - will line up precisely in multi-colored vinyl designs.
Note: This post may contain affiliate links. By clicking on them and purchasing products through my links, I receive a small commission. That's what helps fund Silhouette School so I can keep buying new Silhouette-related products to show you how to get the most out of your machine!
Get Silhouette School lessons delivered to your email inbox! Select Once Daily or Weekly.


.png)


Thank you for this tutorial. Love the transparent vinyl and have so many ideas swimming in my head. this will definitely be helpful.
ReplyDeletegreat instructions! Is there a way to print these? I would love to have them beside my Cameo as I'm doing this. Thanx again. Jerri D
ReplyDeleteThis is a great tutorial and I love the transparent vinyl. My question is, how do you know which layer is the top most layer? I'm assuming the black is the bottom layer.
ReplyDeleteThanks!
What a great idea!! <3
ReplyDeleteMelissa, do you layer on your mat to ensure accuracy when overlapping the registration marks?
ReplyDelete