I'm so excited to have Nancy from The Colorful Cookie on Silhouette School today to share her beginner tips for making cookie stencils with Silhouette CAMEO or Portrait.
A little over a year ago, I started out on a journey to master the art of cookie decorating. Not long after that, I wanted to be able to make my own custom cookie stencils. There was very little information to be found on creating DIY cookie stencils.
I bought a Silhouette Cameo 3 just a few months ago, started reading Silhouette School Blog and transferred all of that knowledge to making cookie stencils. Now that I have mastered Silhouette Studio, I can make any custom airbrushing shape or word stencil that I need. I knew nothing about the Cameo 3 or Silhouette Studio...but if I can learn, you can too!
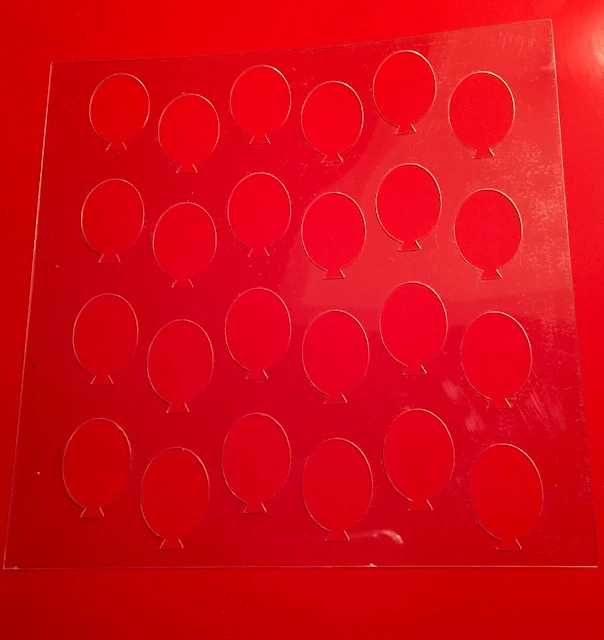
This Silhouette Studio tutorial shows you how to create a balloon background stencil for cookies that you can use to airbrush on the pattern. You can also use these instructions to create a background stencil from any shape you like, for example, stars, polka dots, squares, hearts, anchors. You name it! The possibilities are endless!
Open up Silhouette Studio and use the Draw a Rectangle tool to create a stencil blank by inserting a 5.5”x 5.5” square. This will be the frame for your stencil. Move it aside for right now while you create the stencil shape.
Now for the balloon, find an image of a balloon and trace it or use the Draw an Ellipse and Draw a Polygon tools to draw circle and a small triangle. If you want an oval shaped balloon, don’t hold the shift key down while drawing the circle.
Select both circle and the triangle > right click > Weld. Now size the balloon to about 1 inch tall.
Duplicate the balloon or rows of balloons until you have 4 rows and move them on top of the stencil blank you created. You can place them randomly or use the Object and Align tools if you want them in rows. Group them together.
Select the set of balloons and the square. To center the balloons in the square go to Object > Align > Align Center-Middle.
Make sure they fit within the 5.5”x 5.5” stencil blank. Group them so they stay together and you are ready to cut!
Lay your cookie stencil material on the Silhouette cutting mat. I recommend Grafix .007 or Ruralar by Graphix .005 to make the cookie stencils.
To cut the material for your cookie stencils, you can use the Silhouette CAMEO 3 AutoBlade, ratchet blade, or Premium blade.
Recommended Cut settings for Grafix .007 are: Chipboard, Blade 7, Speed 2, Thickness 33, and double cut 2x (don’t remove the mat, just send it through again).
The best Silhouette CAMEO cut settings for Duralar .005 sheets are: Coverstock, Blade depth 5, Speed 2, Thickness 33, and double cut 2x (don’t remove the mat, just send it through again).
Here is what it looks like when you remove the Grafix stencil sheets from the Silhouette cutting mat.
Now for the cookies!
When airbrushing, I use a stencil frame held together with magnets called the Stencil Genie from Creative Cookier. It holds the stencil in place. Just sandwich the stencil in between the two plastic pieces and place it right on top of the cookie. It can be found here
I am using Lemon Yellow Americolor AmeriMist Airbrush color in my Duff airbrush. Once the stencil is in place, airbrush on the lowest setting so that you don’t get under spray.
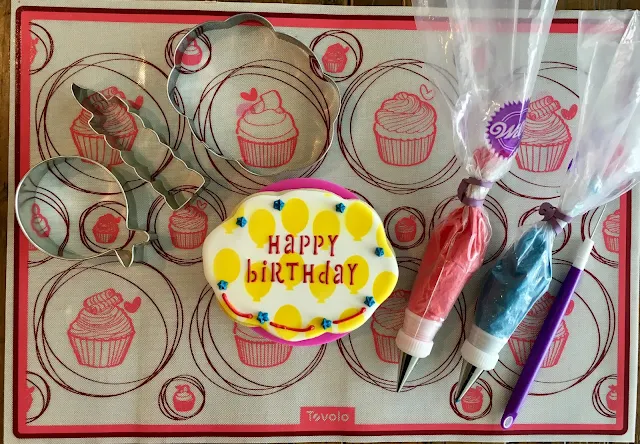
After airbrushing, you can pipe on more decorative icing or create another stencil like the one shown below with the words Happy Birthday.
Word stencils for cookie stencils are a breeze when you learn to bridge the letters so the centers don’t fall out. Melissa's Silhouette CAMEO tutorial on designing cookie stencils explains how to make the bridges.
I know I just threw a lot at you, but I promise you making cookie stencils is easy and fun and a great way for beginners to make their cookies look fabulous! If you're looking for more cookie decorating resources including my favorite cookies recipes, cookie decorating tools and more head on over to my blog The Colorful Cookie and check it out!
Note: This post may contain affiliate links. By clicking on them and purchasing products through my links, I receive a small commission. That's what helps fund Silhouette School so I can keep buying new Silhouette-related products to show you how to get the most out of your machine!
Get Silhouette School lessons delivered to your email inbox! Select Once Daily or Weekly.


.png)


I'm really disappointed with the end result. The cameo cut everything perfectly and it all looked great until I went to remove the stencils from the mat. The material ( acetate I purchased through the affiliate link) was so flimsy it immediately tore. I had never worked with acetate before so I didn't know what to expect but when It arrived, i immediately had doubts. I have previously purchased stencils and there was an obvious difference in strength. I gave this tutorial the benefit of the doubt but in the end, the stencils were just scrap acetate. I now own a pad of acetate and have no use for it. I purchased all new materials for this, I'm out all that $$ that I could have used to just purchase stencils! As a diyer, I rarely ever say that. So disappointed.
ReplyDeleteThanks for this, I was about to but the stencil material
Delete