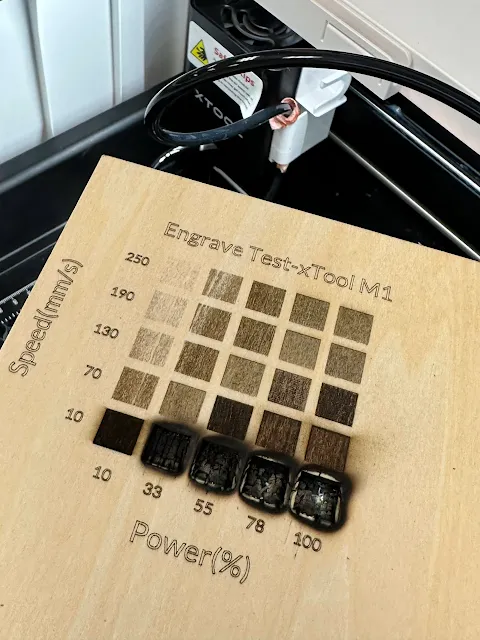
Making an xTool test grid is the easiest and best way to find the perfect laser settings for the material and laser you're using.
When you have a new material you're working with, rather than guessing the laser power and speed, use the free xTool test grid pattern found in xTool Creative Space. Follow along to learn how and where to find a free test grid pattern for xTool lasers!
The laser test grid works for all xTool lasers including the M1 Craft Laser, the more powerful and business-friendly CO2 laser P2, and the portable xTool F1 laser.
Open xTool Creative Space and start a new work area.
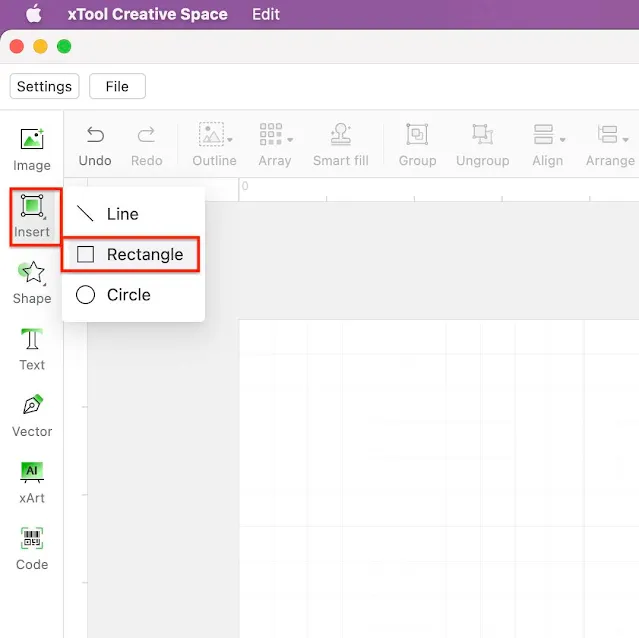
On the sidebar click "Insert" and select Rectangle. Use your mouse to draw a square or rectangle.
With the object selected, pick the type of process you want to test: engrave, score or cut.
Now select the square and select the material you are going to laser engrave or cut. If the exact material is not available find something close. For example if you're working on a stainless steel tumbler pick metal stainless steel tag or if you have a silicone tumbler sleeve pick rubber.
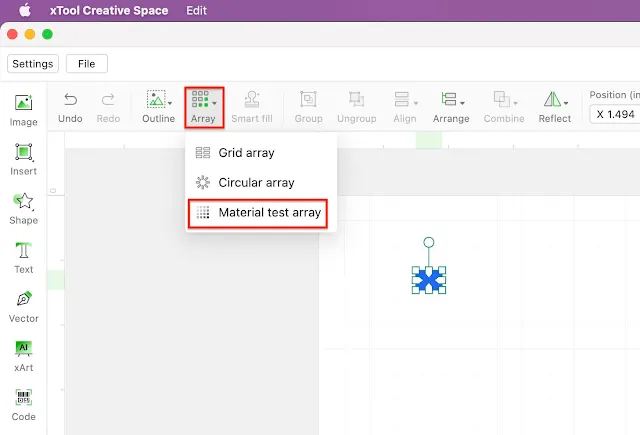
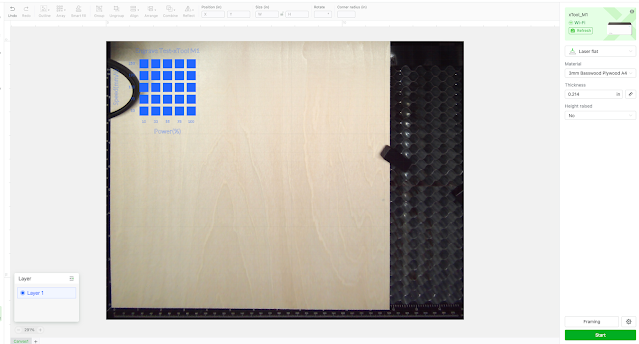
After you've set the parameters for that one square, select it again and click "Array" and "Material Test Array" on the top toolbar.
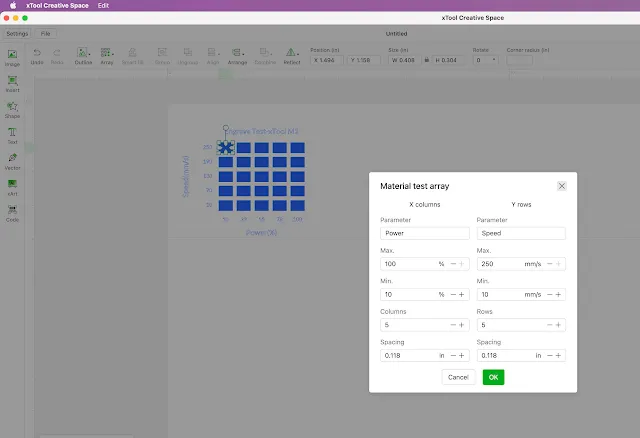
A window will pop up asking you to select the minimum and maximum power and speed. If this is your first time using the test grid, I would suggest just leaving the defaults alone. Click 'Ok'.
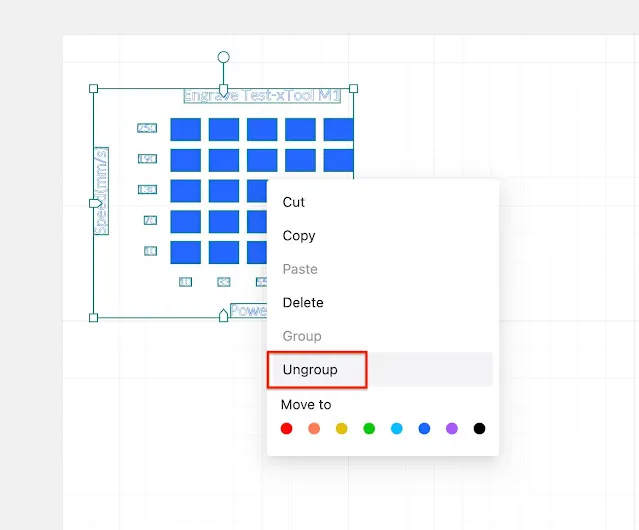
To confirm each square in the grid has a different power and speed setting, ungroup the grid by right clicking it when selected > Ungroup.
You'll then be able to click on each square and confirm that the settings are different.
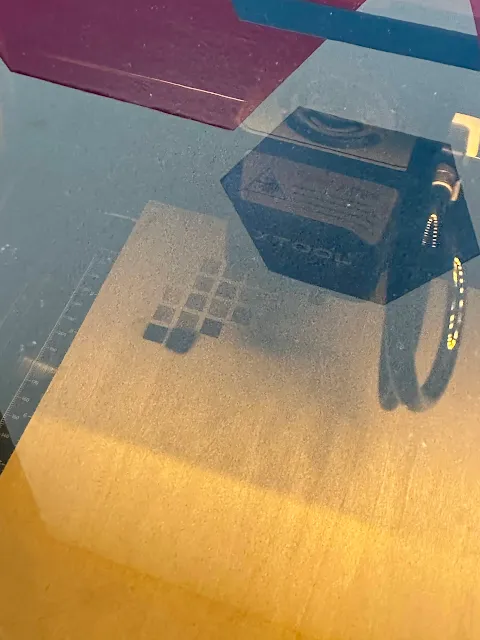
Place the material in the xTool and refresh the view. I'm using my xTool M1 Craft Laser with a piece of wood for this test grid.
You can now move forward with processing the engraving by clicking Start > Start > and Button on the front of the xTool.
Keep the test grid (TIP: laser cut a square around it so you just have a small test grid to store) so you can refer to it for future laser projects where you may want a different level of laser burn or shading.
And of course this works for many different types of materials - anything you want to test first to find the best settings!
You can also create custom settings based on your preferred setting combinations so you can save them easily in the software for the next time you engrave.








.png)


No comments
Thanks for leaving a comment! We get several hundred comments a day. While we appreciate every single one of them it's nearly impossible to respond back to all of them, all the time. So... if you could help me by treating these comments like a forum where readers help readers.
In addition, don't forget to look for specific answers by using the Search Box on the blog. If you're still not having any luck, feel free to email me with your question.