I wouldn't suggest this for large areas, due to how long it takes to print, but for a nook or a smaller area this is the perfect way to print your own wallpaper on removable vinyl. Using the Wallflair adhesive vinyl makes the wallpaper peel and stick so there's no damage to the walls AND it's super easy to apply!
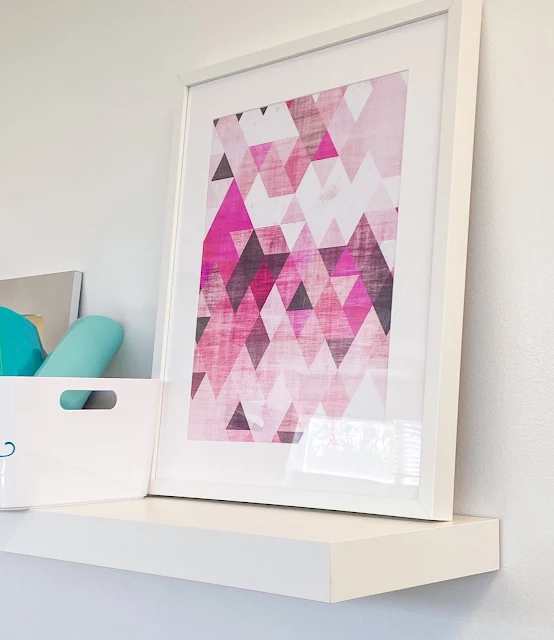
I purchased this pink triangle geometric design originally to print a 16x20 print to fill a frame on the shelving in my craft room.
But then decided it would look AMAZING behind these basic, boring and very white shelves.
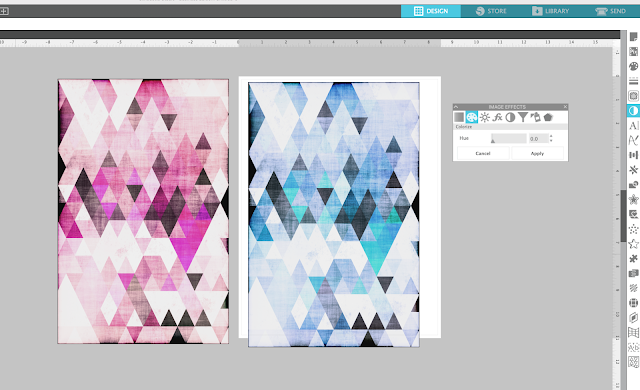
I brought the JPEG file into Silhouette Studio, use the Image Effects tool to adjust it to blue tones and then exported as a PDF.
I imported the PDF file into Roland Versaworks and at this point the image was still 8.5 x 11". However, the open area behind the shelves is about 46.5" wide x 76" high.
You can adjust the size of the image right in Roland Versaworks and it will automatically tile it for you if the width is wider than about 18.9"...which of course this is.
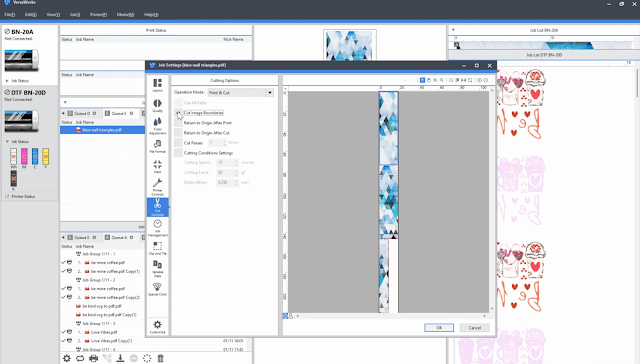
Once the file is in the queue > right click > Settings.
Start in the Clip and Tile panel clip off any white space around the edge of the image by checking the box for "Clip Image" and then using the boxes.
Move to the Layout panel make the following changes:
Orientation: R (upright)
Scale: Adjust the size to the dimensions you need
From the Quality tab select Generic Vinyl 1 as. the media type and then pick your print quality noting the time it will take to print.
Under Color Management on the same tab change to True Rich Color 3.
Finally in the Cut Controls panel change to Cut Image Boundary.
Click "Ok" to save all your settings. This will return you to the main queue.
To make the DIY Wallpaper peel and stick I used Roland Wallflair removable adhesive vinyl. Load the 20" roll into the Roland BN-20A or BN-20 and from Versaworks click "Print."
From the queue in Versaworks right click the design and click "Print." It will first Rip the file then send to print.
Because I printed in the highest resolution possible, this 76" long, three panel wide print took about 5 hours to print.
The great thing though is it only took about 20 minutes to install. I did not use any transfer tape at all.
I folded about the top inch of each section down and applied that to the wall making sure it was straight. Then I slowly peeled away the backing kind of rolling it down and pressing the vinyl wallpaper onto the wall as I went.
I repeated this two more times with the remaining two peel and stick panels.
The most challenging part of this whole project, was making sure the pattern on the panels lined up exactly. Here's a timelapse video of the full process to hang the DIY peel and stick wallpaper.
I can't stop staring!! The pattern and pop of color make such a huge difference in the space!
If you're interested in making your own Peel and Stick Wallpaper here's a supply list you can shop.
Note: This post may contain affiliate links. By clicking on them and purchasing products through my links, I receive a small commission. That's what helps fund Silhouette School so I can keep buying new Silhouette-related products to show you how to get the most out of your machine!
Get Silhouette School lessons delivered to your email inbox! Select Once Daily or Weekly.


.png)


This is genius! You are so creative, guess that's why we all follow you.
ReplyDelete