As I was browsing through the Link it or Lump It Link party over on our sister site, Two It Yourself, I spotted these oh, so adorable Mr and Mrs (Always) Right Mugs. Are they not the cutest thing, ever?!
How to Trace a Photo in Silhouette Studio
Thursday, February 27, 2014
We're answering a reader question today on Silhouette School about how to trace a photograph to make a silhouette image in Silhouette Studio. The question comes from Kathy, but I'm sure she's not the only one who's been wondering how to do this.
Turning Off Eraser and Knife Tools in Silhouette Studio
Wednesday, February 26, 2014
Frustrations over how to turn off the eraser and knife tool in Silhouette Studio is something I've heard repeatedly. This week when a reader by the name of Sandy asked me for help with this very issue, after she read the Silhouette manual and still couldn't find an easy way to turn off the eraser tool, I decided it was time to put out a tutorial on it.
Free State Fonts/Stencils for Silhouette {and 10 fabulous State Craft Ideas}
Tuesday, February 25, 2014
Personalized State art and wood signs are really popular...because let's face it everyone likes to be reminded of home.
Did you know you can get all 50 state silhouettes for free and they can easily be used in Silhouette Studio? The answer is State dingbat fonts. There are actually several state fonts out there to use and since you can use any font downloaded on your computer in Silhouette, there are several options.
Did you know you can get all 50 state silhouettes for free and they can easily be used in Silhouette Studio? The answer is State dingbat fonts. There are actually several state fonts out there to use and since you can use any font downloaded on your computer in Silhouette, there are several options.
DingMaps is a free font available from FontSpace - States are each a black silhouette
United States is a free font from FontSpace - States are a white outline with a black drop shadow
StateFace is a free download and free for commercial use from FontSquirrel
Just download your favorite, install it on your computer and then open up Silhouette Studio. Click on the text tool and pick the state font. Start typing capital and lower case letters until you find your state.
Silhouette cutting above the gridded area? How to fix it (on Portrait and Cameo)
Monday, February 24, 2014
Is your Silhouette blade cutting above the gridded area of the mat and therefore you are losing some of your cut design? If this keeps happening to you (and your designs are not outside the gridded area in Studio), your machine is actually not malfunctioning. The problem can be fixed with just the press of a button.
The secret's in the load button.
Portrait:
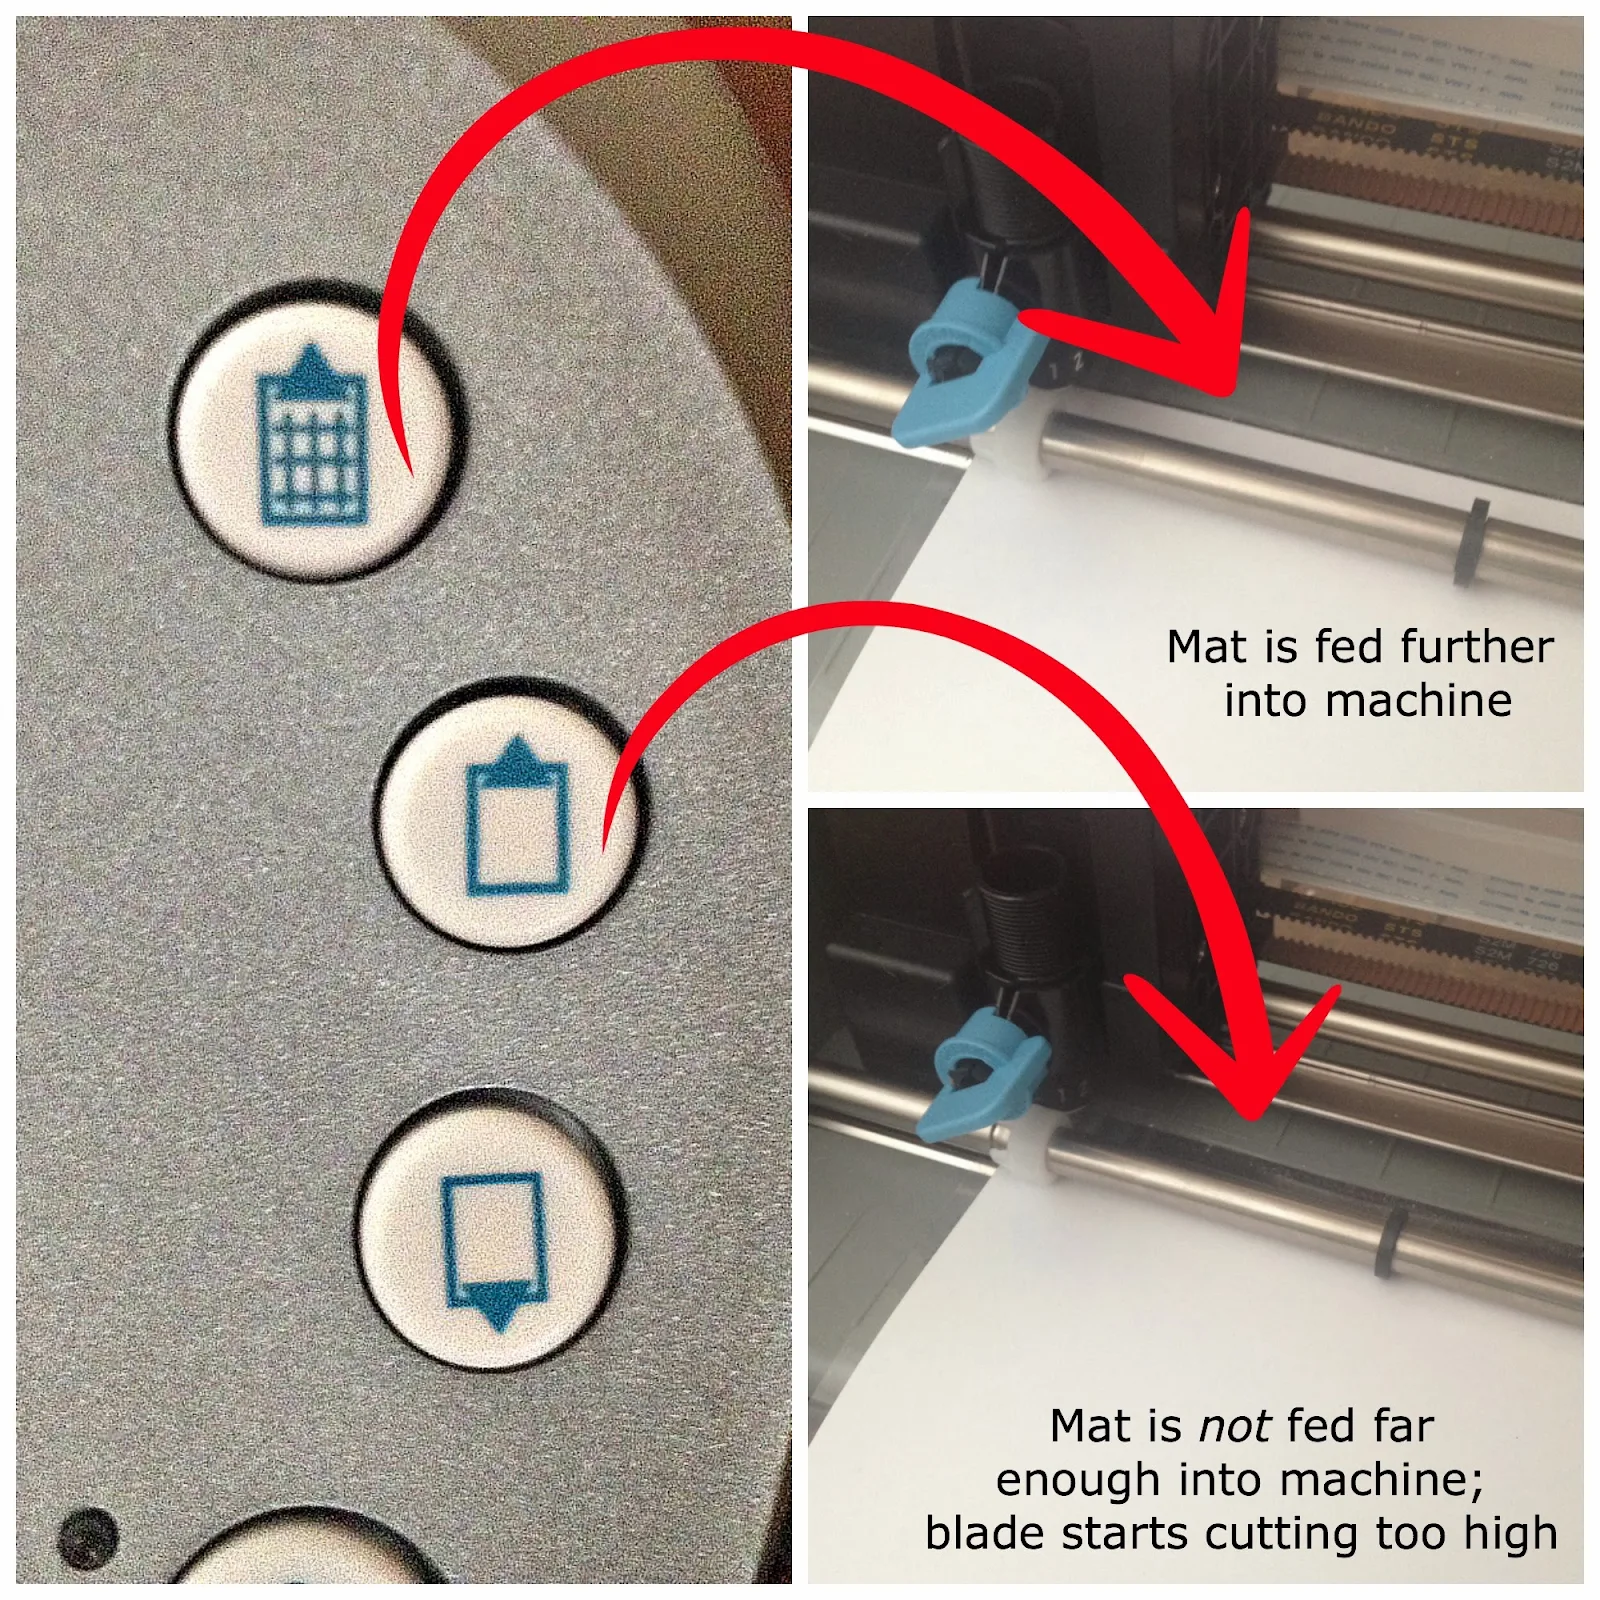
If you are using the cutting mat on your Silhouette Portrait, ensure that you are using the gridded Load Cutting Mat button to feed the mat and your material into the Silhouette.
If you use the other "Load Media" button, your mat will not be fed far enough into the machine therefore the blade starts cutting higher and out of the gridded area. Can you see the difference in how far the mat/paper was pulled into the machine in the picture below?
The Load Media button (second button from top in picture above) should only be used when you are not using the cutting mat and loading materials like vinyl. In those instances the blade can start cutting closer to the edge of the loaded material.
CAMEO:
If you're Silhouette Cameo is cutting above the gridded area of the cutting mat, you can fix it by using the up and down arrows on the Silhouette to scroll through until 'Load Cutting Mat' is displayed on the screen. Then press 'Enter' and your mat will feed through.
Thanks for coming to class today at Silhouette School. If you like what you see, I'd love for you to pin it!
Note: It's a slightly different fix for the Portrait and the Cameo and here we explain both. I have the Portrait so images will be for that tutorial with an explanation on fixing loading issues on the Cameo further down the page.
The secret's in the load button.
Portrait:
If you are using the cutting mat on your Silhouette Portrait, ensure that you are using the gridded Load Cutting Mat button to feed the mat and your material into the Silhouette.
If you use the other "Load Media" button, your mat will not be fed far enough into the machine therefore the blade starts cutting higher and out of the gridded area. Can you see the difference in how far the mat/paper was pulled into the machine in the picture below?
The Load Media button (second button from top in picture above) should only be used when you are not using the cutting mat and loading materials like vinyl. In those instances the blade can start cutting closer to the edge of the loaded material.
CAMEO:
If you're Silhouette Cameo is cutting above the gridded area of the cutting mat, you can fix it by using the up and down arrows on the Silhouette to scroll through until 'Load Cutting Mat' is displayed on the screen. Then press 'Enter' and your mat will feed through.
Thanks for coming to class today at Silhouette School. If you like what you see, I'd love for you to pin it!
Changing Silhouette Designs: A Point Editing Tutorial
Friday, February 21, 2014
If you haven't already picked up on it I'm a bit of a thrifty girl. I don't like to spend money when I don't have. Perhaps my dingbat font hack or my tips on stretching your .99 in the Silhouette Online Store clued you in? If not, you will get a full sense of my thriftiness here....
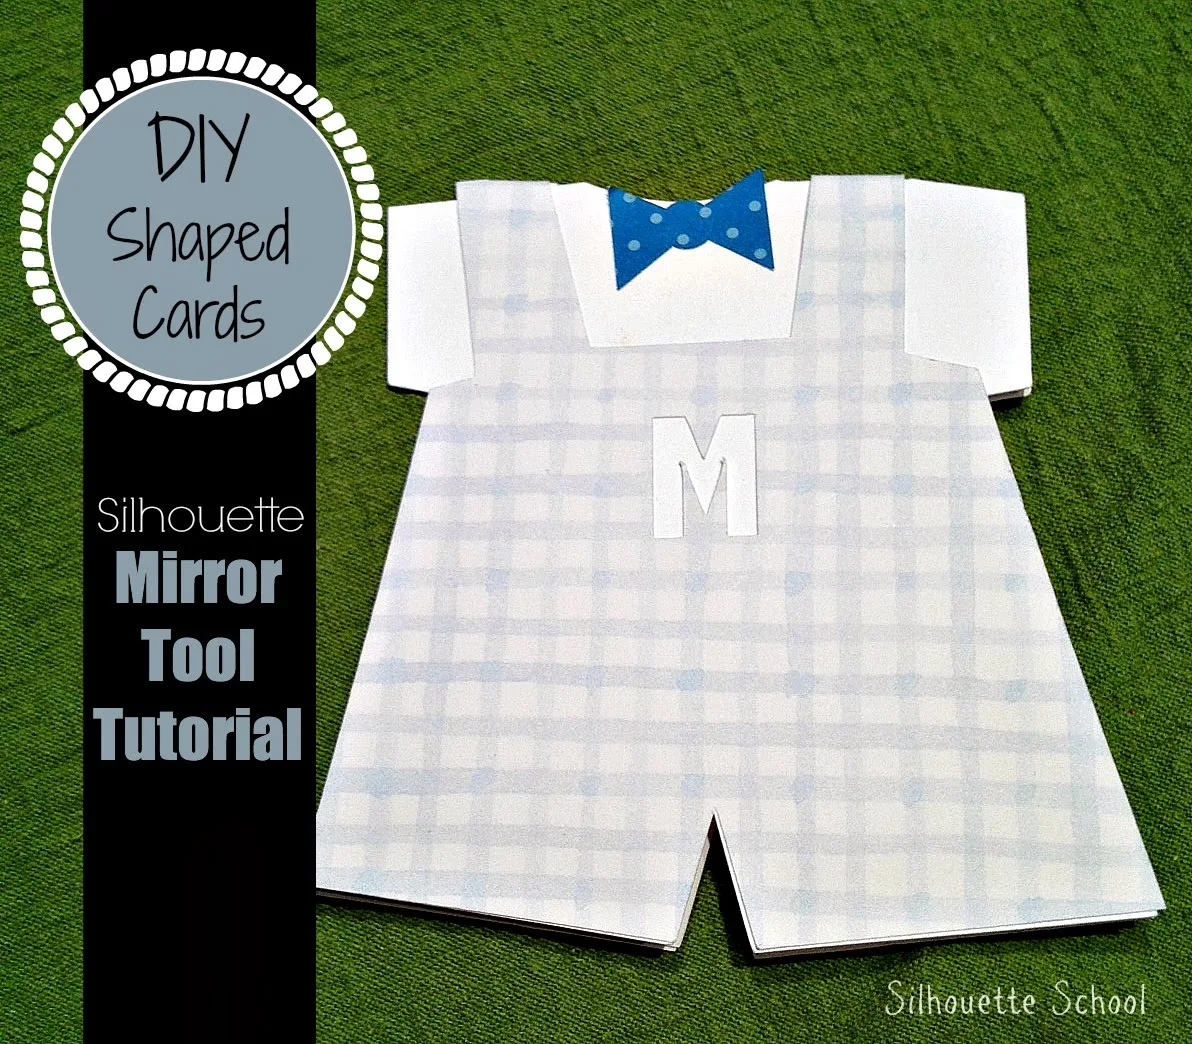
Yesterday, I shared a full basics tutorial on making shaped cards using the Studio mirror tool. See how cute this baby boy shaped card came out?!
...So cute that I wanted to make a little girl version. So today I'm going to show you how to use that same basic design from the 'Baby Boy Motif' and slightly modify. Of course, this is only one example, but the concept of editing points on a design can be used in countless ways.
Sure, you could just use the design as it is and print on girl-themed paper, but why not take it to the next level and turn those overalls into a cute little dress? It's actually very simple. All you need is the point editing tool.
Pull your design into Silhouette Studio. Again, we're only working with the overalls and the onesie so I ungrouped and deleted the other design elements to give myself some room to work.
I also immediately rotated the overall piece so it's right side up to avoid any confusion when mirror that image. I don't need the buttons, so I deleted them.
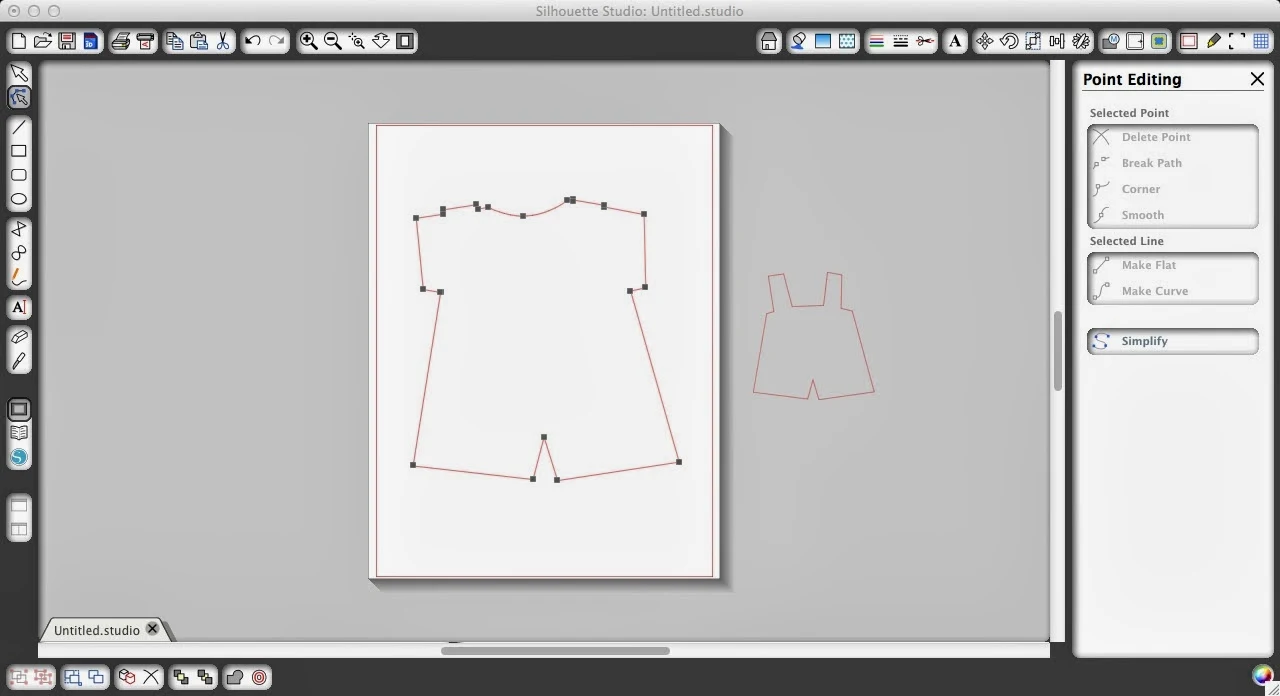
The basic design needs to be adjusted in just a few places...the most obvious is at the legs. Let's work first with the onesie. If you click on the design once you get the highlight box around the image. While it's highlighted, double click right on on red outline. This reveals a whole bunch of edit points. It also brings up the Point Editing window on the right side of the screen.
Each one of those dots or edit points can be moved or deleted to edit the shape of the design. I simply pulled the crotch point down to turn the little onesie shorts into a dress. I also moved the points at the arm pits in slightly so the design was a little less boxy.
That's it for the overalls! I told you this was easy peesey!
Now to make sure the overalls/dress line up correctly when it's cut, you want to drag it on top of the onesie, adjust the size to match and then move the edit points the same way you did with the onesie.
After you have adjusted all your edit points on the overalls/dress, move the two outlines apart. You are now ready to turn your little girl dress and onesie into a baby girl card by mirroring the images, welding, and cutting!
Thanks for coming to class today at Silhouette School. If you like what you see, I'd love for you to pin it!
Yesterday, I shared a full basics tutorial on making shaped cards using the Studio mirror tool. See how cute this baby boy shaped card came out?!
...So cute that I wanted to make a little girl version. So today I'm going to show you how to use that same basic design from the 'Baby Boy Motif' and slightly modify. Of course, this is only one example, but the concept of editing points on a design can be used in countless ways.
Sure, you could just use the design as it is and print on girl-themed paper, but why not take it to the next level and turn those overalls into a cute little dress? It's actually very simple. All you need is the point editing tool.
Pull your design into Silhouette Studio. Again, we're only working with the overalls and the onesie so I ungrouped and deleted the other design elements to give myself some room to work.
I also immediately rotated the overall piece so it's right side up to avoid any confusion when mirror that image. I don't need the buttons, so I deleted them.
The basic design needs to be adjusted in just a few places...the most obvious is at the legs. Let's work first with the onesie. If you click on the design once you get the highlight box around the image. While it's highlighted, double click right on on red outline. This reveals a whole bunch of edit points. It also brings up the Point Editing window on the right side of the screen.
Each one of those dots or edit points can be moved or deleted to edit the shape of the design. I simply pulled the crotch point down to turn the little onesie shorts into a dress. I also moved the points at the arm pits in slightly so the design was a little less boxy.
That's it for the overalls! I told you this was easy peesey!
Now to make sure the overalls/dress line up correctly when it's cut, you want to drag it on top of the onesie, adjust the size to match and then move the edit points the same way you did with the onesie.
Thanks for coming to class today at Silhouette School. If you like what you see, I'd love for you to pin it!
DIY Shaped Cards: A Silhouette Mirror Tool Tutorial
Thursday, February 20, 2014
My husband is anti-card...he'd much prefer me to spend $2.99 on something for myself than he would me spend that money on a card for him. Fifteen years and he's kinda rubbing off on me. That being said, it doesn't mean I'm not into giving cards, it just means I'm not into buying them.
Fortunately, the Silhouette can make cards faster than I could even drive to the store, browse the card aisle, pick just the perfect one out, and hand over my hard earned cash. I did just that last week when I made this cute little shaped baby card for a friend who just had her first little boy. (Oh, she has no idea what she's in for after having two girls...I can say this with confidence having one of each myself.)
I hadn't decided what card I would make for my friend until I got a question from a Silhouette School reader about a baby card she was having trouble making. Virginia was having trouble with her baby card and wrote to me asking for some help.
"I wanted to take the basic shape that was the melting of the overalls and onsie to make a card that folds over from the top. I mirror imaged it, adjusted points to the shoulders would touch and then welded it. Unfortunately the basic design is not square so now I am stuck with a card that does not fold and match....Would you be willing to do a tutorial for this idea on your site?"Why, yes, Virginia I would! Thanks for asking...and I'll make the same card right along with you.
How to Make Fonts More Silhouette-Friendly
Wednesday, February 19, 2014
One of the great things about Silhouette Studio is that you can access any font that is downloaded and installed on your computer. While that means there are literally thousands of options, not all fonts are equal when it comes to Silhouette.
I briefly touched on this in reference to chalkboard fonts - as seen below - which often have a lot of detail and honestly, for me, are more of a headache than it's worth for a stencil or cut design. Can you imagine weeding all those little dots...and that's if the blade could even cut it without ripping those extremely tiny details.
I briefly touched on this in reference to chalkboard fonts - as seen below - which often have a lot of detail and honestly, for me, are more of a headache than it's worth for a stencil or cut design. Can you imagine weeding all those little dots...and that's if the blade could even cut it without ripping those extremely tiny details.
Bathroom Quotes Wall Art or Chalkboard (Free Silhouette .Studio File)
Tuesday, February 18, 2014
Last week on our sister site, Two It Yourself, I shared a tutorial for how to turn an old picture frame into a DIY chalkboard. I also revealed, as if it wasn't obvious from the pictures, that I do not have the best fancy handwriting and so I turned to my Silhouette to make a stencil for my chalkboard saying.
There are lots of free chalkboard fonts out there that you can download and install and then use in Silhouette Studio. The problem is many of them have a lot of detail and these don't make for the best stencils because there are simply too many pieces. See what I mean....
There are lots of free chalkboard fonts out there that you can download and install and then use in Silhouette Studio. The problem is many of them have a lot of detail and these don't make for the best stencils because there are simply too many pieces. See what I mean....
Silhouette Circle Monogram Tutorial {Free Font}
Monday, February 17, 2014
I can't get enough monograms. I've said it before and I'll say it again: I love monograms. A few weeks ago I made this faux framed monogram wall art for our master bedroom. Last week I remembered I had another monogram font that I had downloaded a few months ago that I thought would make a cool Silhouette cut...and it sure did.
Personalized Chunky Wood Frame using Silhouette
Thursday, February 13, 2014
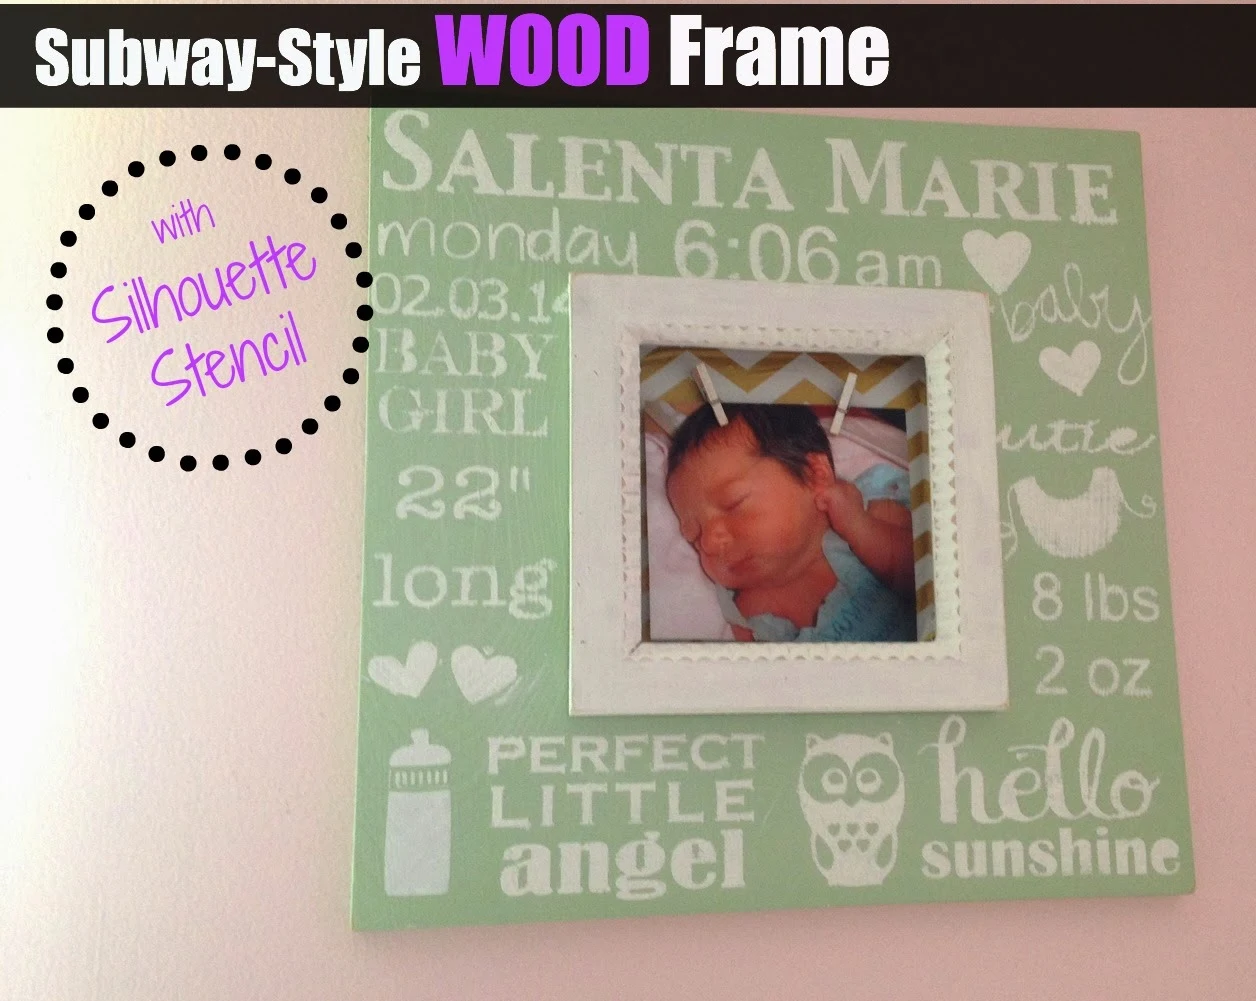
If you're not following along on my DIY blog, Two It Yourself, you're missing out on goodies like this. I shared the tutorial on how to make this chunky wood frame today and here I'm going to show you who I made the stencil using my Silhouette. Of course this stencil can be personalized in so many ways starting with the most obvious - that baby's name and birth information. You also have endless options for different fonts, sayings and little designs.
DIY Dishwasher Magnets: Clean/Dirty Silhouette Magnets Tutorial {Sub Teacher Project}
Wednesday, February 12, 2014
We have a substitute teacher sharing a really fun tutorial at Silhouette School today. Please help me welcome Margarent from Southpaw Crafts! She's sharing a detailed step by step tutorial how you can create your own dishwasher magnet using Silhouette Studio. I'll let Margaret take it from here...
I sell this item in my Southpaw Crafts Etsy store. It's so simple and fun to make I thought I'd teach you how to do it yourself. This tutorial is for personal use only. :)
Customizing Silhouette Studio Print and Cut Files (Tutorial)
Tuesday, February 11, 2014
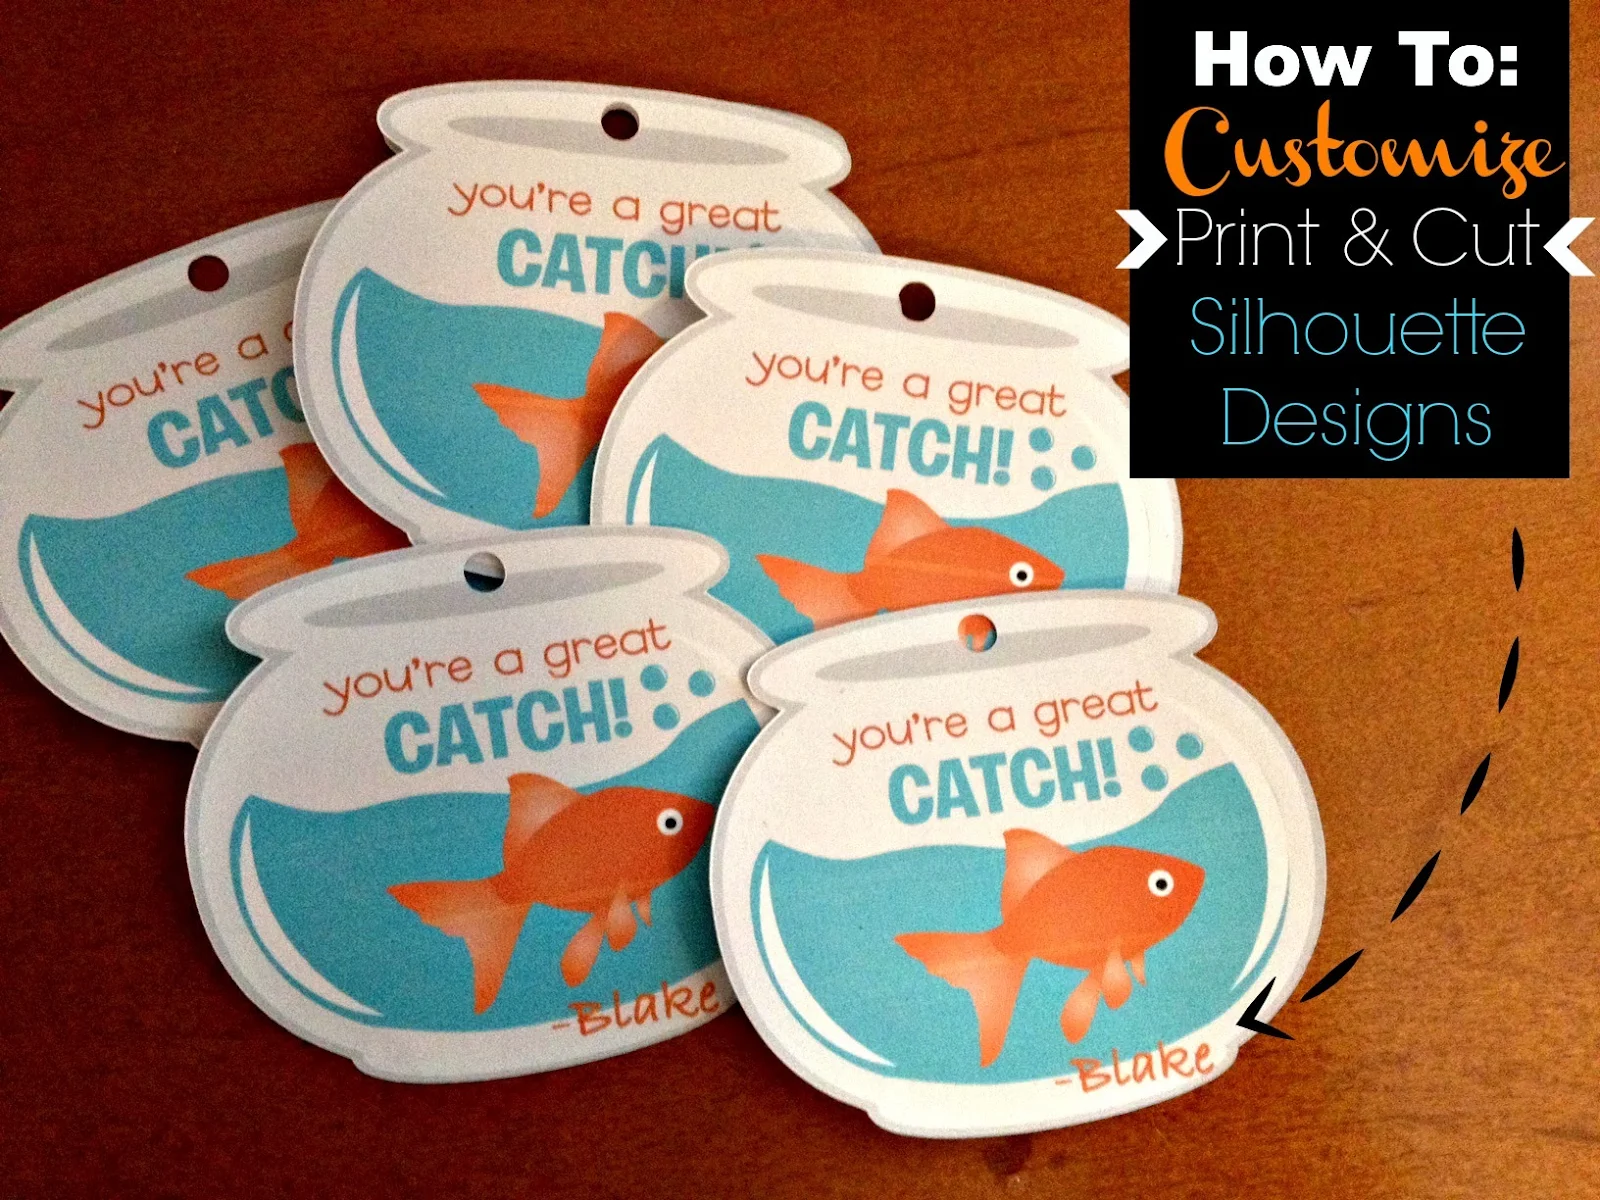
So you're ready to take the next step...and take Silhouette Print and Cut 102, I see! Good for you. The Print and Cut Tutorial for Beginners is where I recommend you begin if you haven't worked with print and cut files on your Silhouette yet. Once you get the basics down, it's easy to move on and personalize and change Print and Cut files to get them exactly how you want them.
Silhouette Cutting Mat: Should the blade be cutting it?
Friday, February 7, 2014
The Silhouette Cutting Mat can make or break a project and therefore it brings up a lot of questions and concerns. If it's not sticky enough the paper or medium can slip around and the design will get all wonky. If it's too sticky it can be tough to remove the cut designs. If the mat's loaded wrong the blade may cut outside the cut area. And what about the blade actually cutting the mat? That's the question we're answering today from a reader.
Joann asks: "If my design is visible on the (cutting) mat, am I cutting too deeply? I know they are replaceable but...$$"
Joann asks: "If my design is visible on the (cutting) mat, am I cutting too deeply? I know they are replaceable but...$$"
Valentine's Day Subway Art (Silhouette Tutorial)
Thursday, February 6, 2014
Last week I shared the greatness of freezer paper stencils for painting Silhouette cut designs. I gave a sneak peek of a project I've been working on and today I am sharing the full project. It was actually one of my very first Silhouette projects.
Silhouette Instruction Manual & Studio Tool Descriptions
Wednesday, February 5, 2014
If you have a Silhouette you know that whether you have the Portrait or the Cameo the cutting machines don't come with much instruction. So today we're going to be answering a reader's question that I'm sure many Silhouette users have had at one point or another. The question comes from Joann...
First off, can we all just agree that Joann is not alone. There are a ton of buttons and the possibilities to create are nearly endless, but knowing how to create with all those options can seem confusing, overwhelming. and intimidating."Do you know of any glossary available for Studio? ... Their icons don't feel user-friendly at all. When I do find the one I think I need, I would like to know its purpose and limitations. (I figured out "erase" but it took forever to be able to turn it off). (I expect there is a way to "nudge" a line - as into a curve. But I haven't found it). As for the "point edit tool, rounded rectangle, line tool, etc. - well just forget it.
Now that you have figured out just how lazy I must be, you understand I just want a "Quick Reference" or "Cheat Sheet". If you know of one, THANKS in advance."
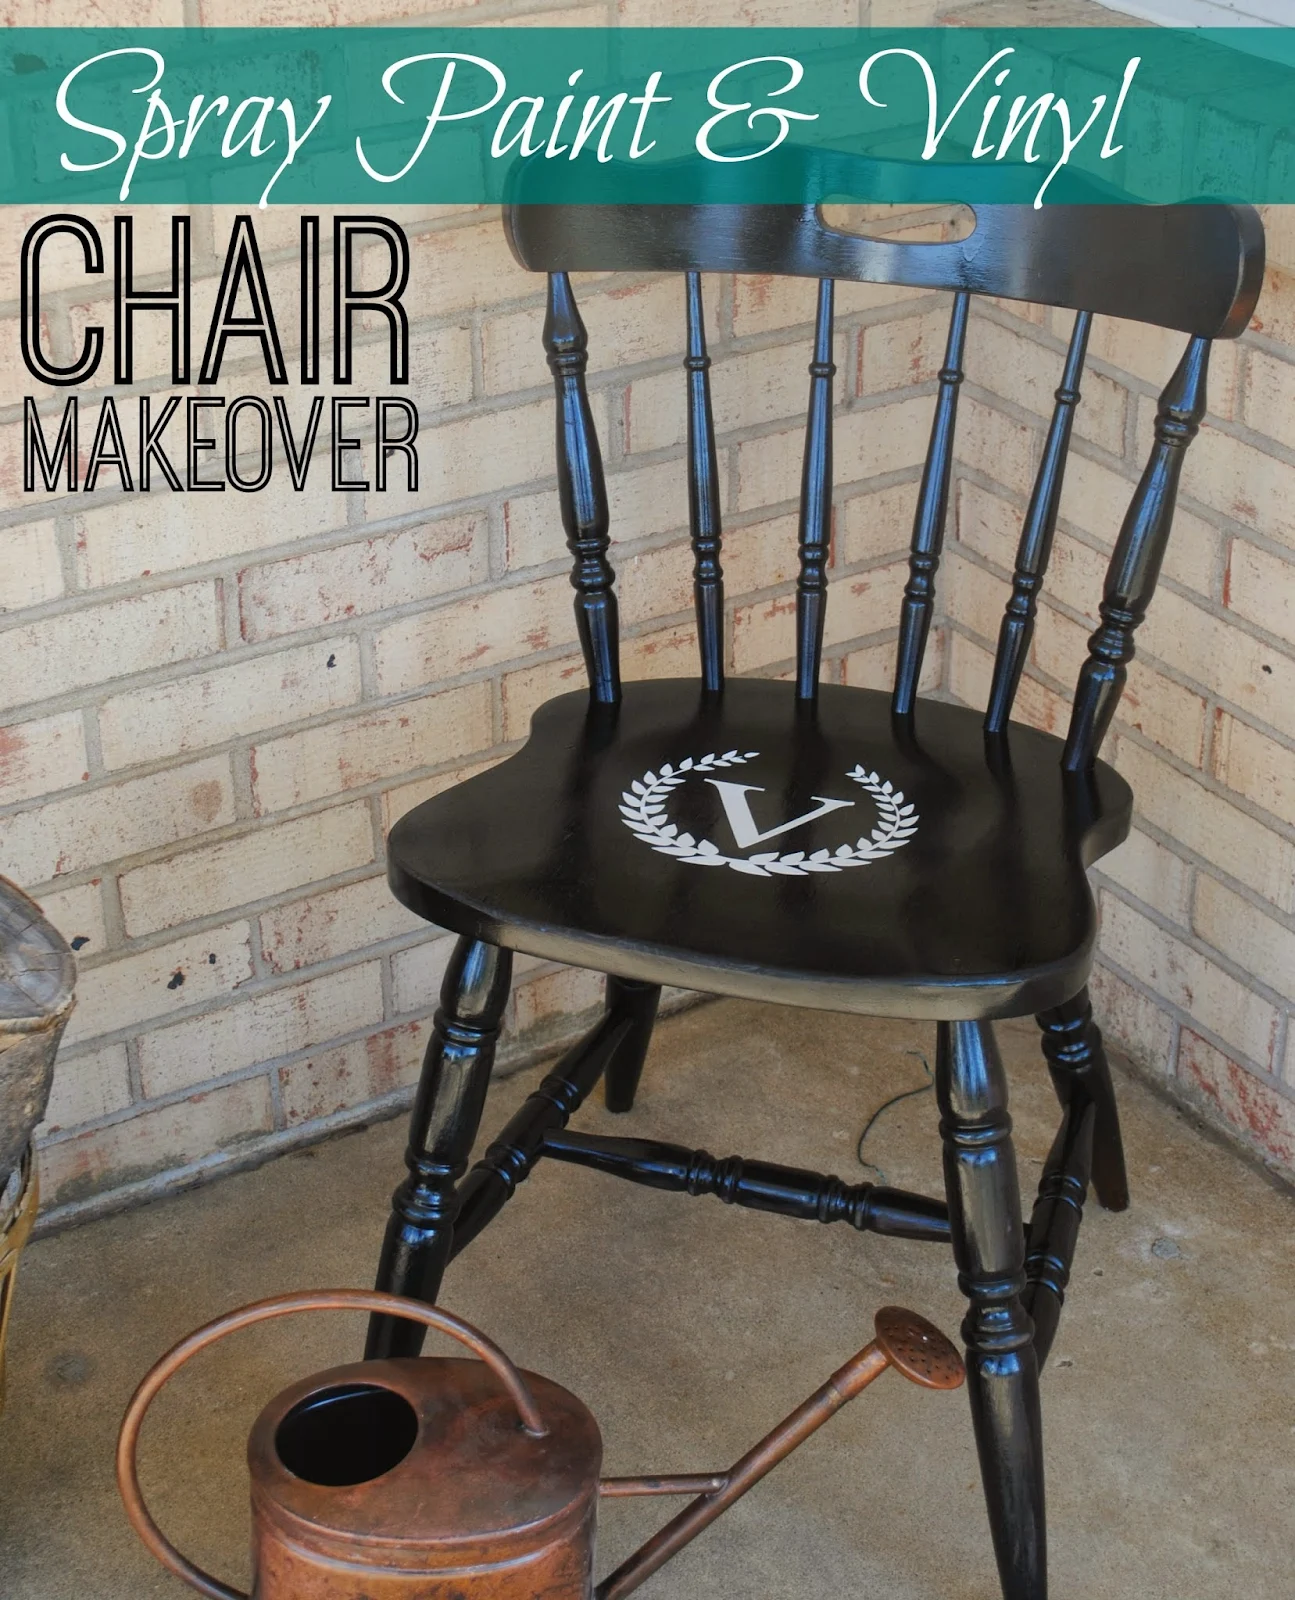
Vinyl and Spray Paint Wood Chair Makeover
Tuesday, February 4, 2014
A few months back I was driving down the road and I see this guy putting a bunch of 'stuff' out by the curb with a big sign that said 'FREE!' The luck! I quickly pulled over and snagged this wood chair. It would do until I could find a bench for my front porch. The chair - just as it was when I threw it in my trunk - has sat on my front porch all winter.
Share Silhouette Studio Files Easily (Tutorial)
Monday, February 3, 2014
So you've created a really cool design in Silhouette Studio and now you want to share it with the world for free. This is possible and it's also free to do.
Silhouette 3D Paper Hearts (Free Studio File)
Saturday, February 1, 2014
A few weeks back I shared on our sister site, Two It Yourself, the labor intensive way to make 3D paper hearts using these old fashioned things called scissors. Kidding, of course. But the good news for you, is if you're here it very likely means you have a Silhouette and therefore you have a far easier way to make 3D paper hearts. (If you somehow landed here, but you don't have a Silhouette, here's the tutorial on cutting 3D hearts without the die cut machine.) This is one of those basic craft projects that, once made, can be used in so many different ways.
Subscribe to:
Posts (Atom)












.png)
